Last Updated: November 11, 2025
Welcome to the ElementorKit Help Center! Here you’ll find easy, step-by-step guides to help you make the most of your template kits. Learn how to install Elementor Template Kits, import headers and footers, and set up MetForm directly from your chosen kit — everything you need to start building beautiful WordPress websites with ease.
Learn how to quickly install and import your Elementor template kits directly inside WordPress — no coding required.
Step 1: Prepare Your WordPress Environment
- In your WordPress dashboard, go to Settings → Permalinks, make sure Post Name is selected, then click Save.
- Navigate to Appearance → Themes, and ensure Hello Elementor is installed and activated.
Step 2: Import Your Template Kit
- Go to ElementorKit → Template Kits and browse through the available designs. You can search by keywords (features, style, niche, or author) or use the category filters to narrow down results.
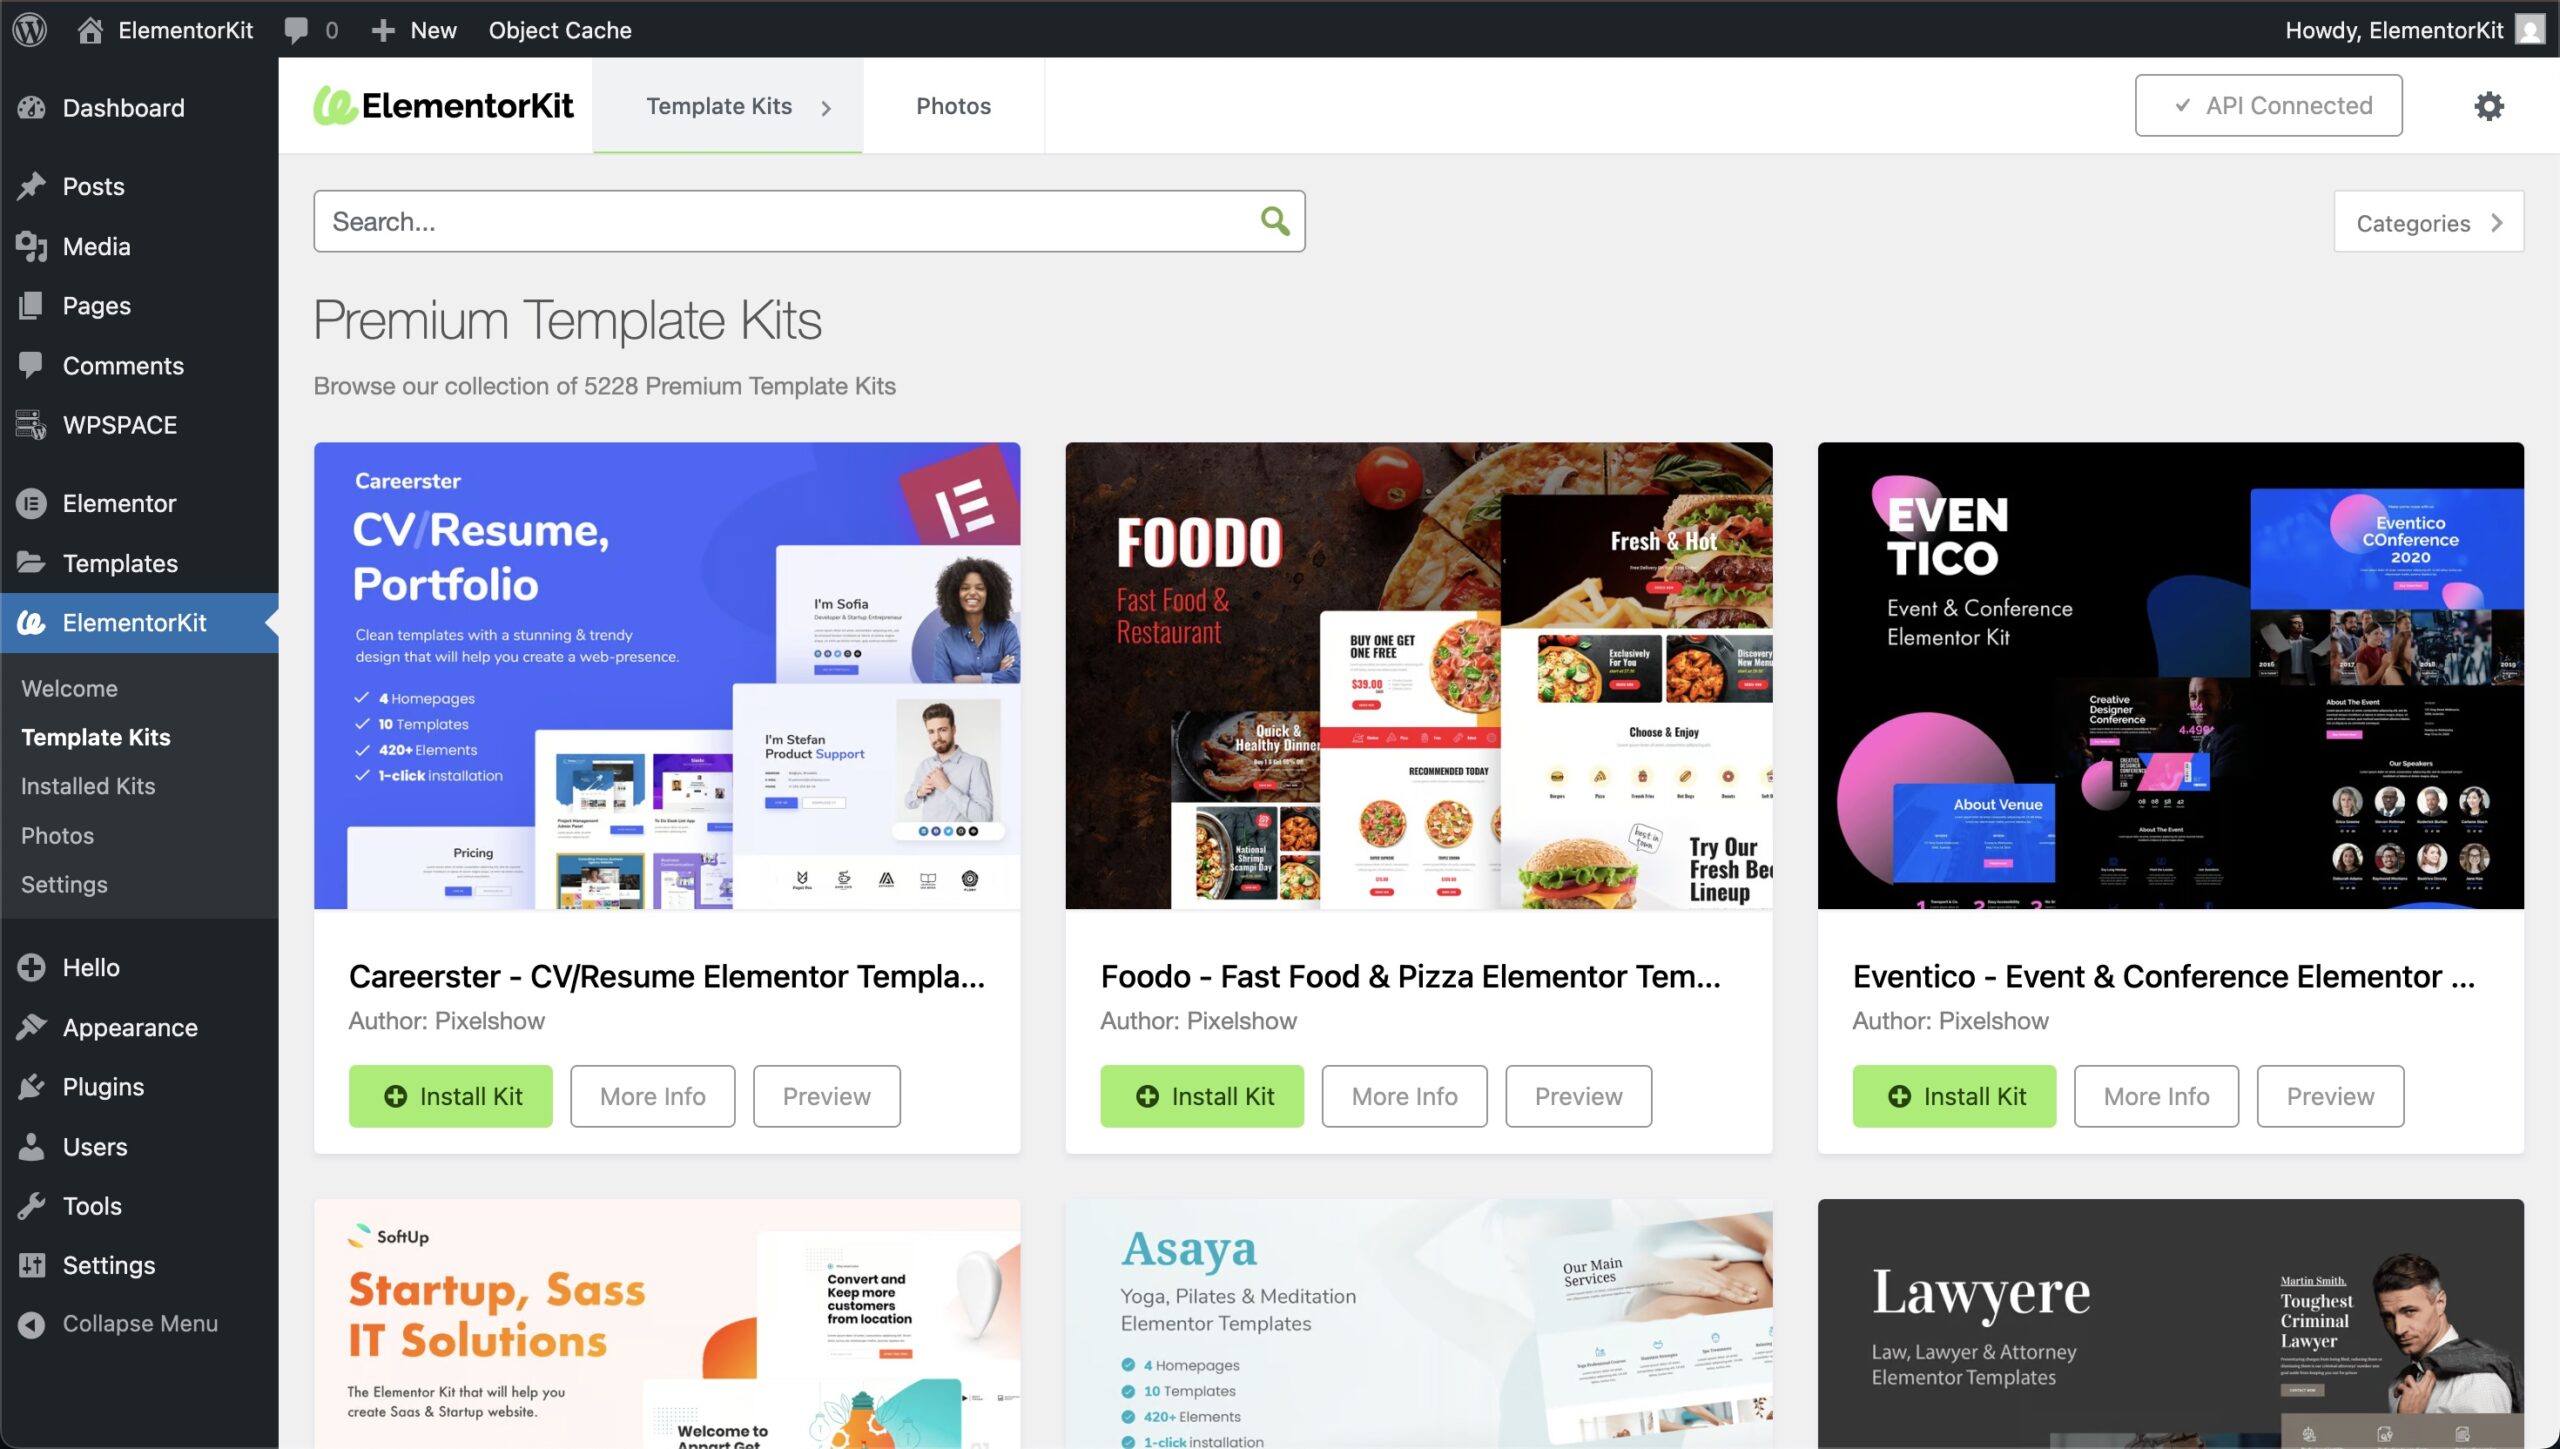
- Click Install Kit on the one you’d like to use.
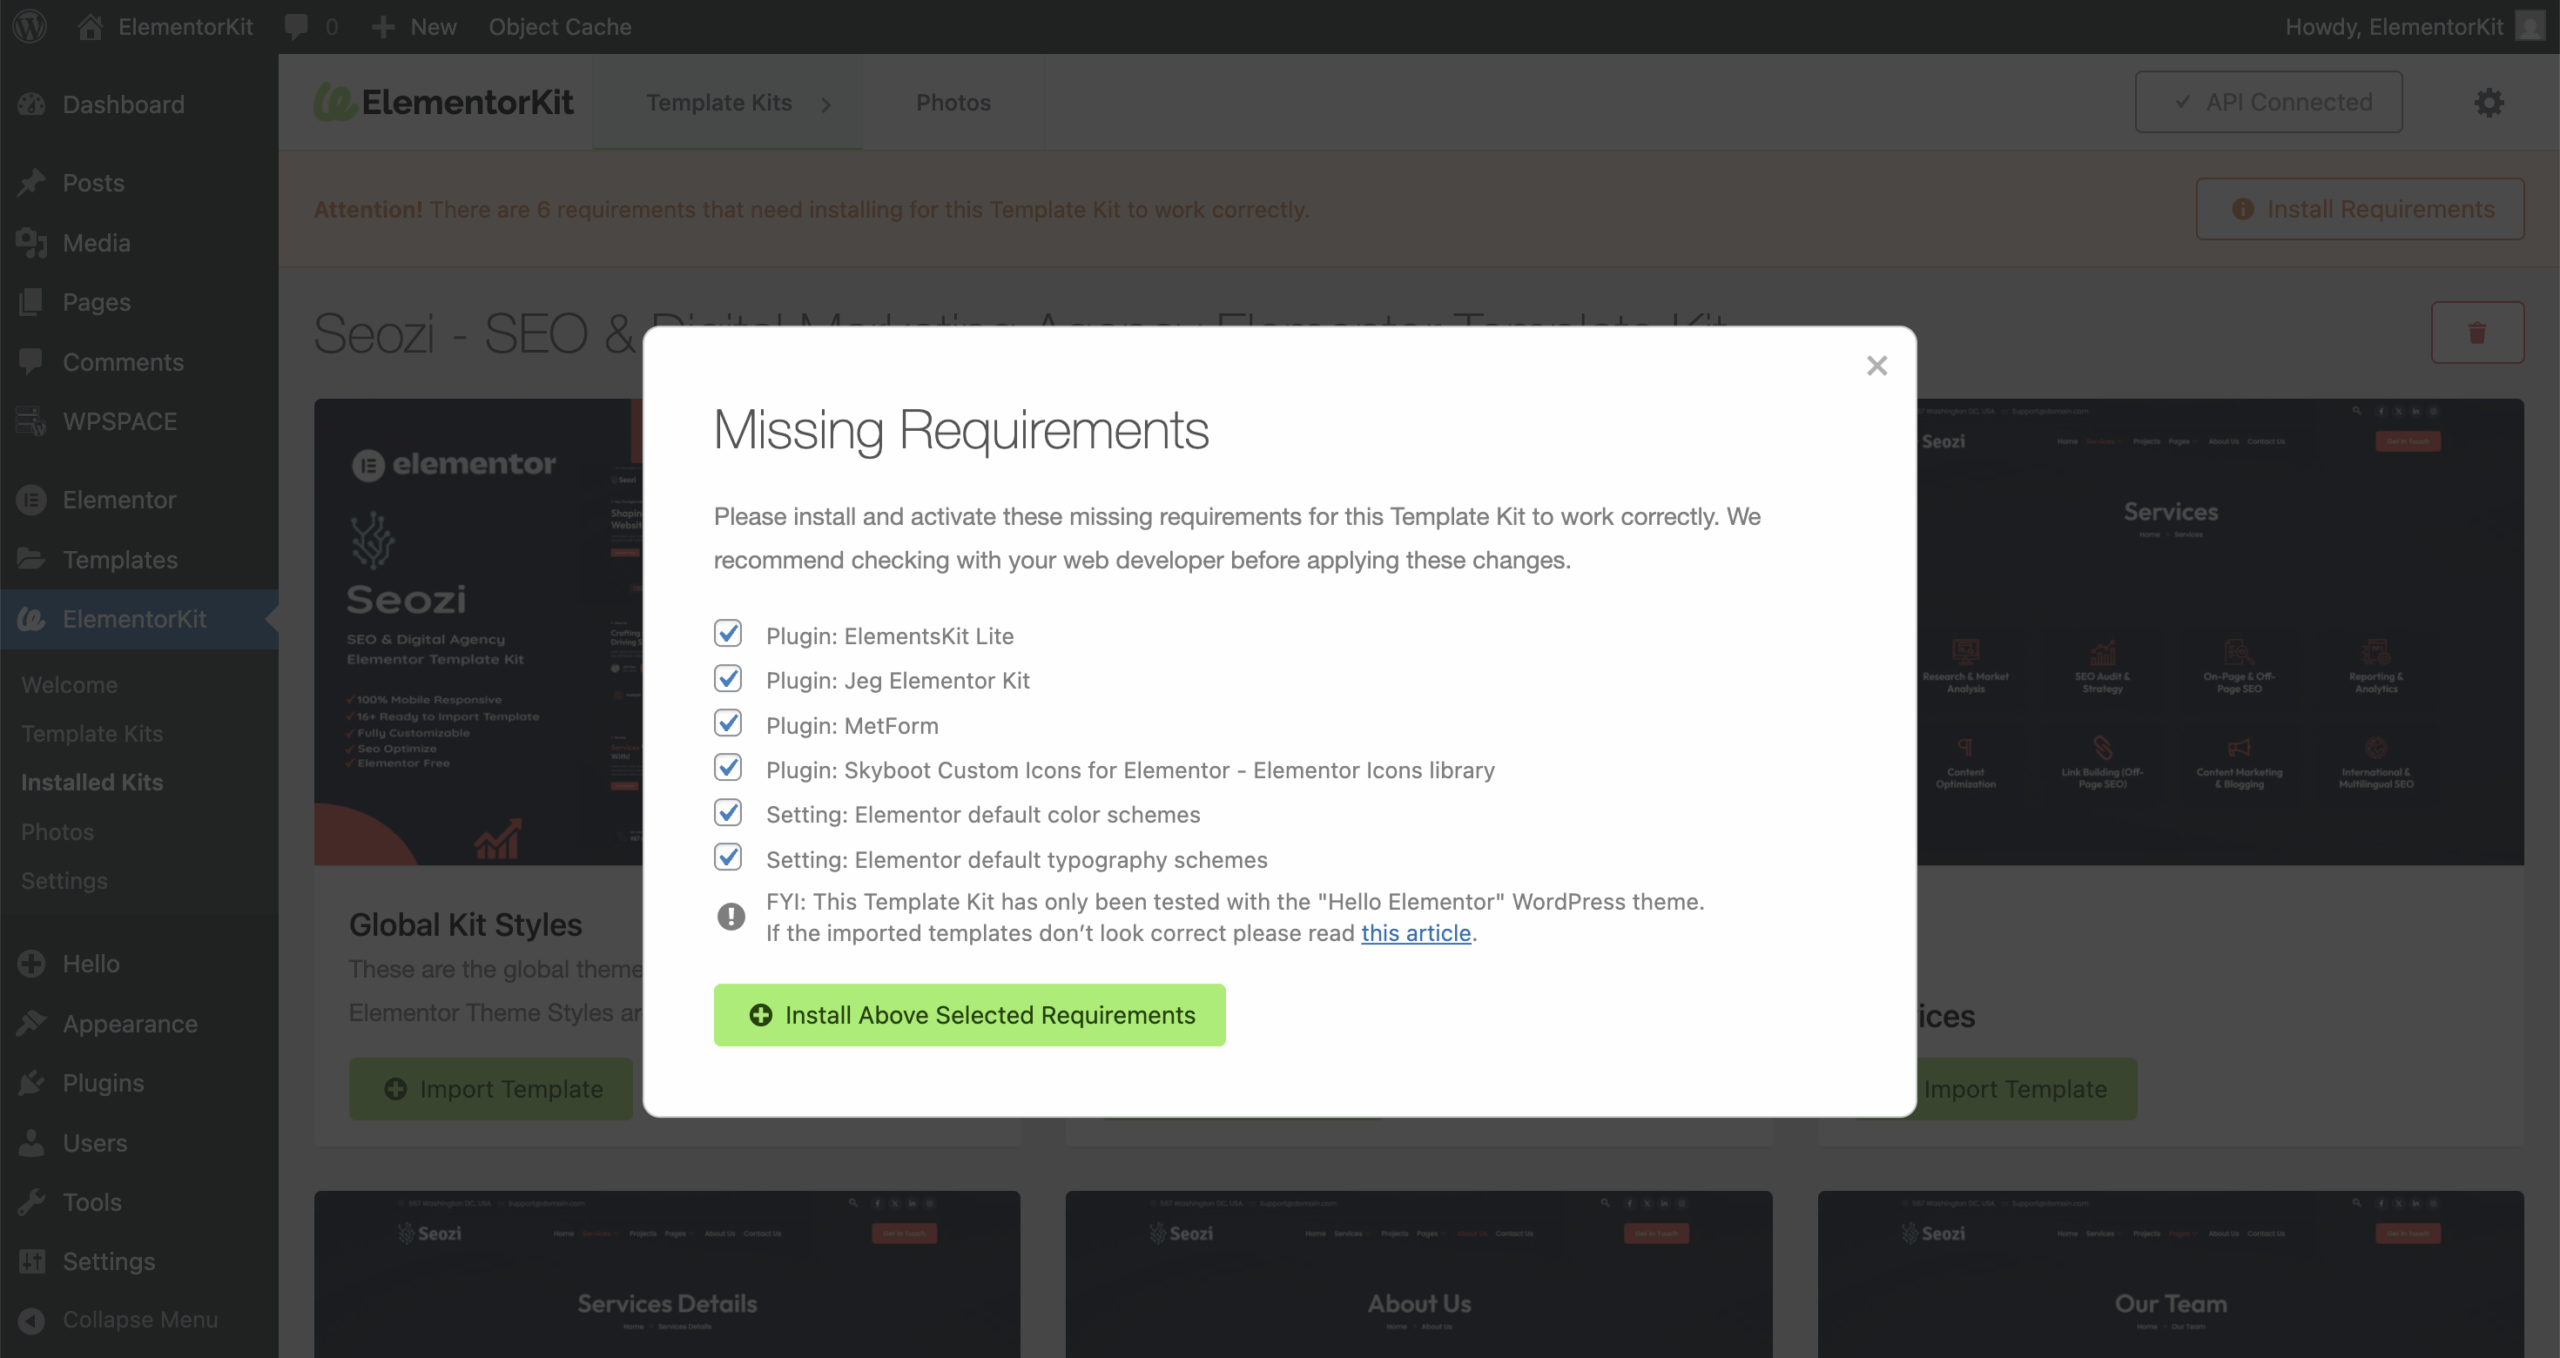
- Click View Kit, then look for a banner at the top and click Install Requirements to install any necessary add-ons.
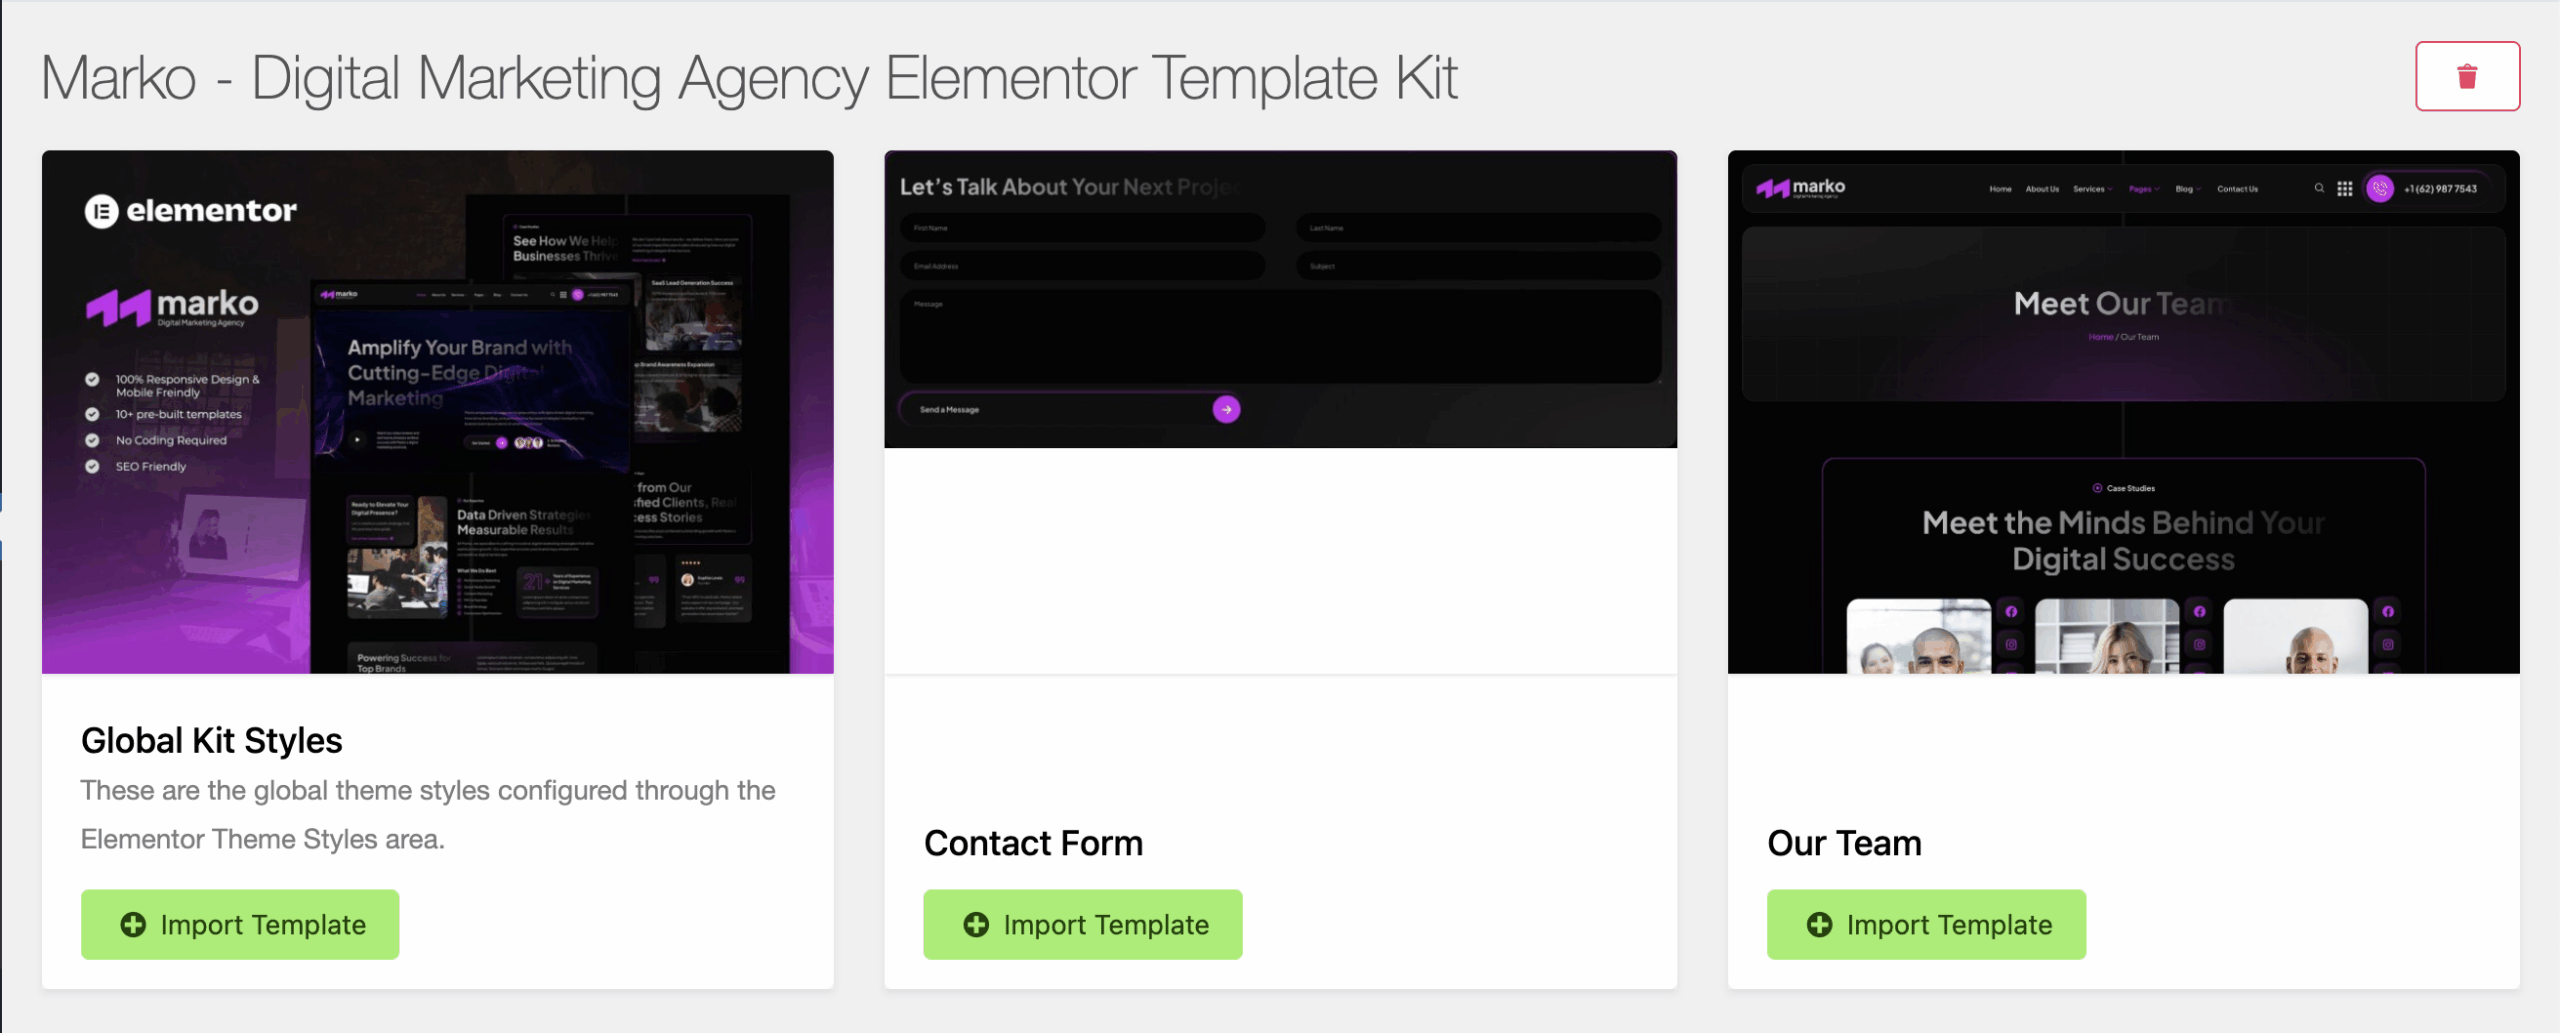
- Start by importing Global Kit Styles (this applies the kit’s fonts, colors, and site settings). Then import each template one by one, in the order shown.
Step 3: Use Templates to Build Your Pages
- Go to Pages → Add New, set a page title, then click Edit with Elementor.
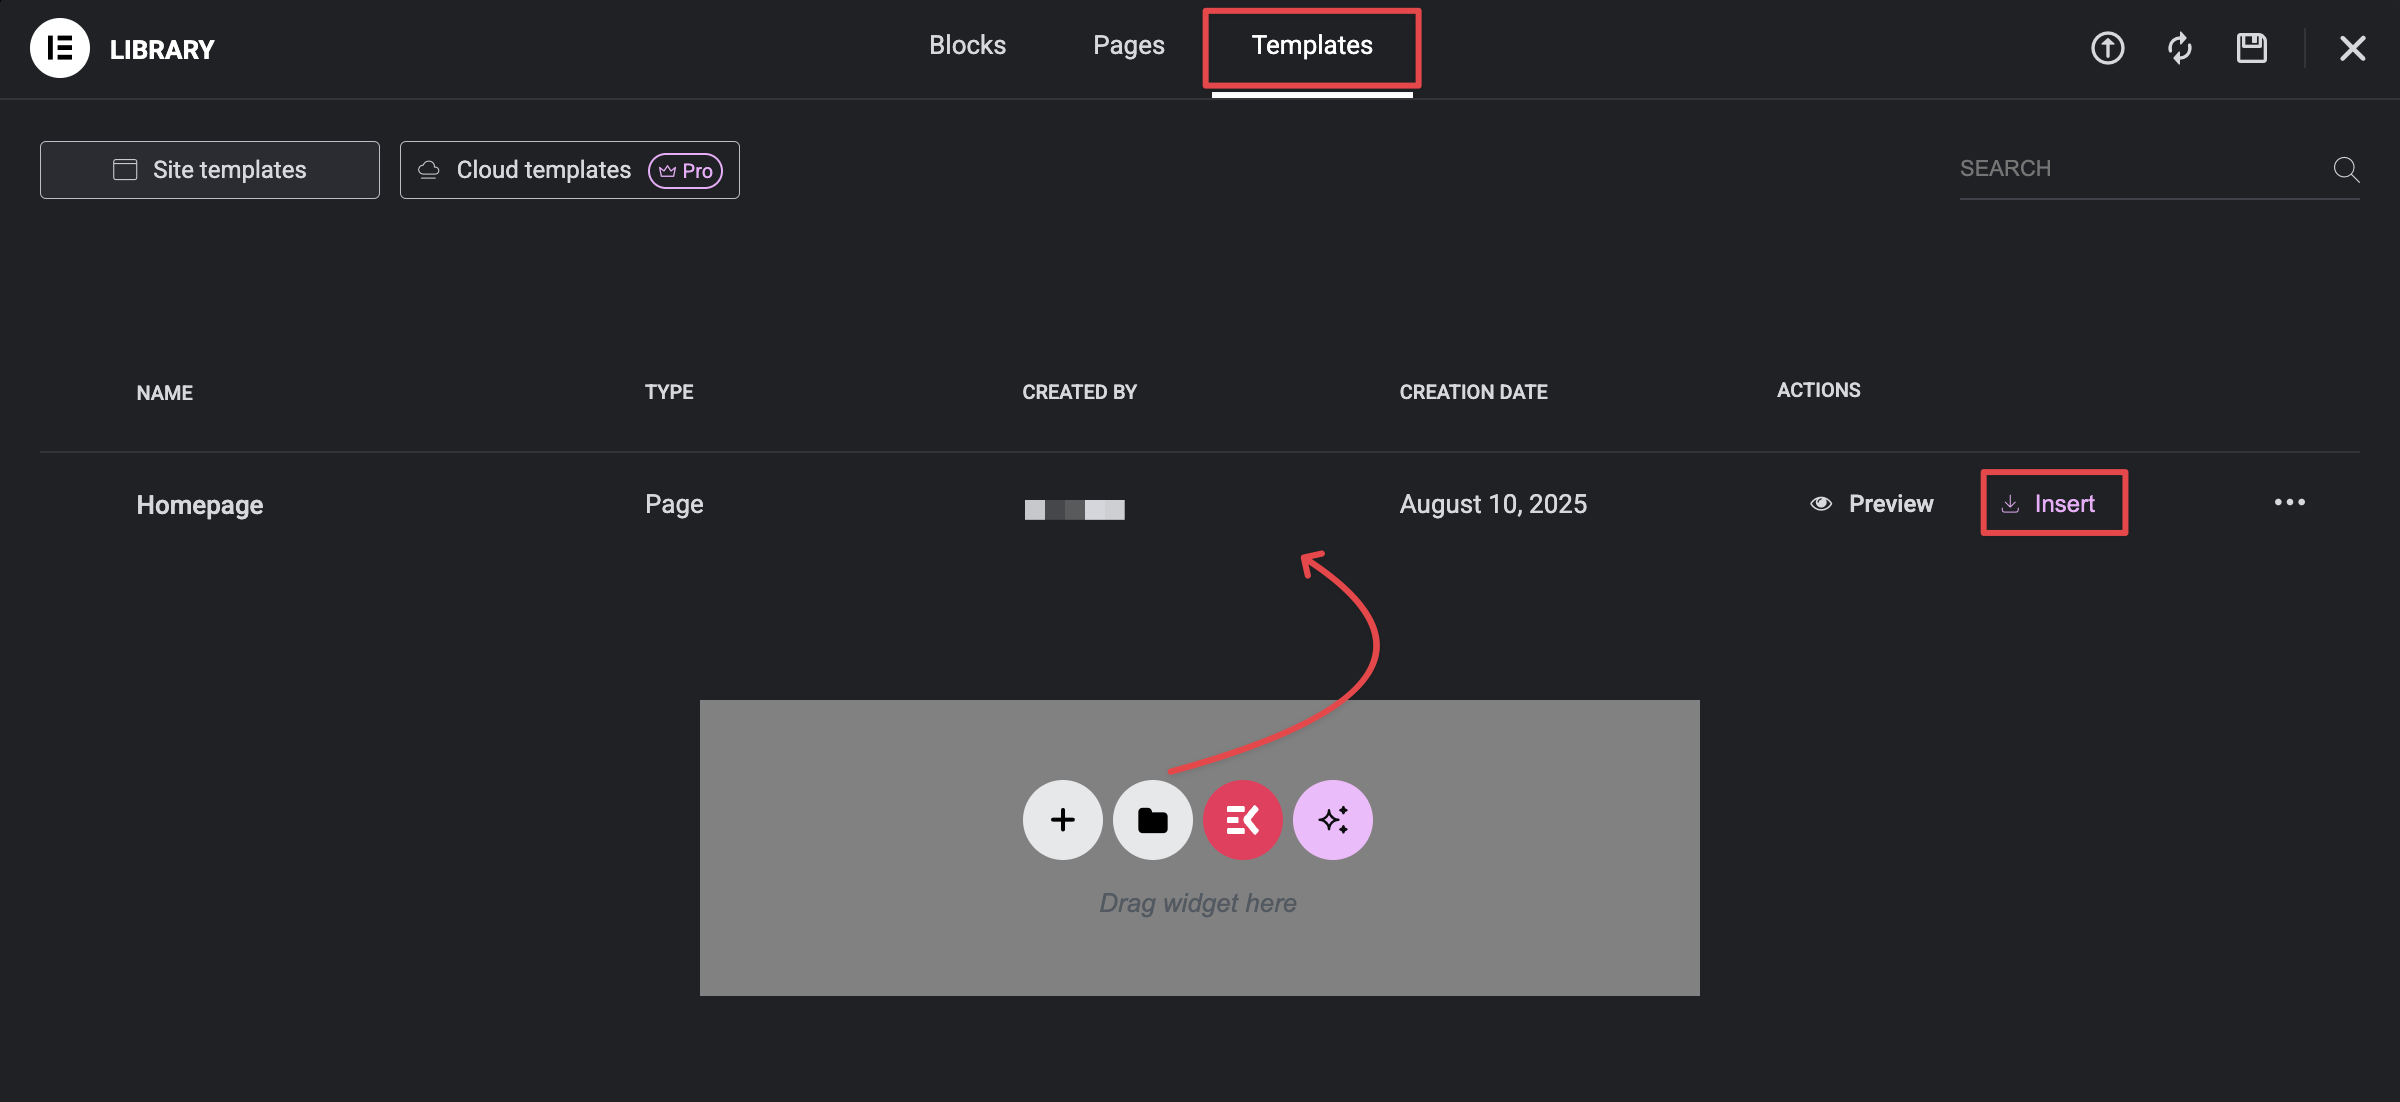
- In the Elementor editor, click the grey folder icon to open the template library.
- Insert your chosen templates into the page.
When building your WordPress site with Elementor Template Kits, importing the header and footer is an important step to get the full design and navigation working seamlessly across your site.
Here’s a simple guide to help you import the header and footer from your Template Kit quickly and correctly.
Why Import Header and Footer?
The header and footer sections control your site’s main navigation, branding, and footer widgets. Importing them ensures your site looks professional and consistent on every page.
Step 1: Open the Template Kit in Elementor
- Log in to your WordPress dashboard.
- Go to Elements → Template Kits.
- Click View Kit on the Template Kit you want to use.
- Find the Header and Footer templates in the kit.
Step 2: Import Header Template
- Click Import next to the Header template.
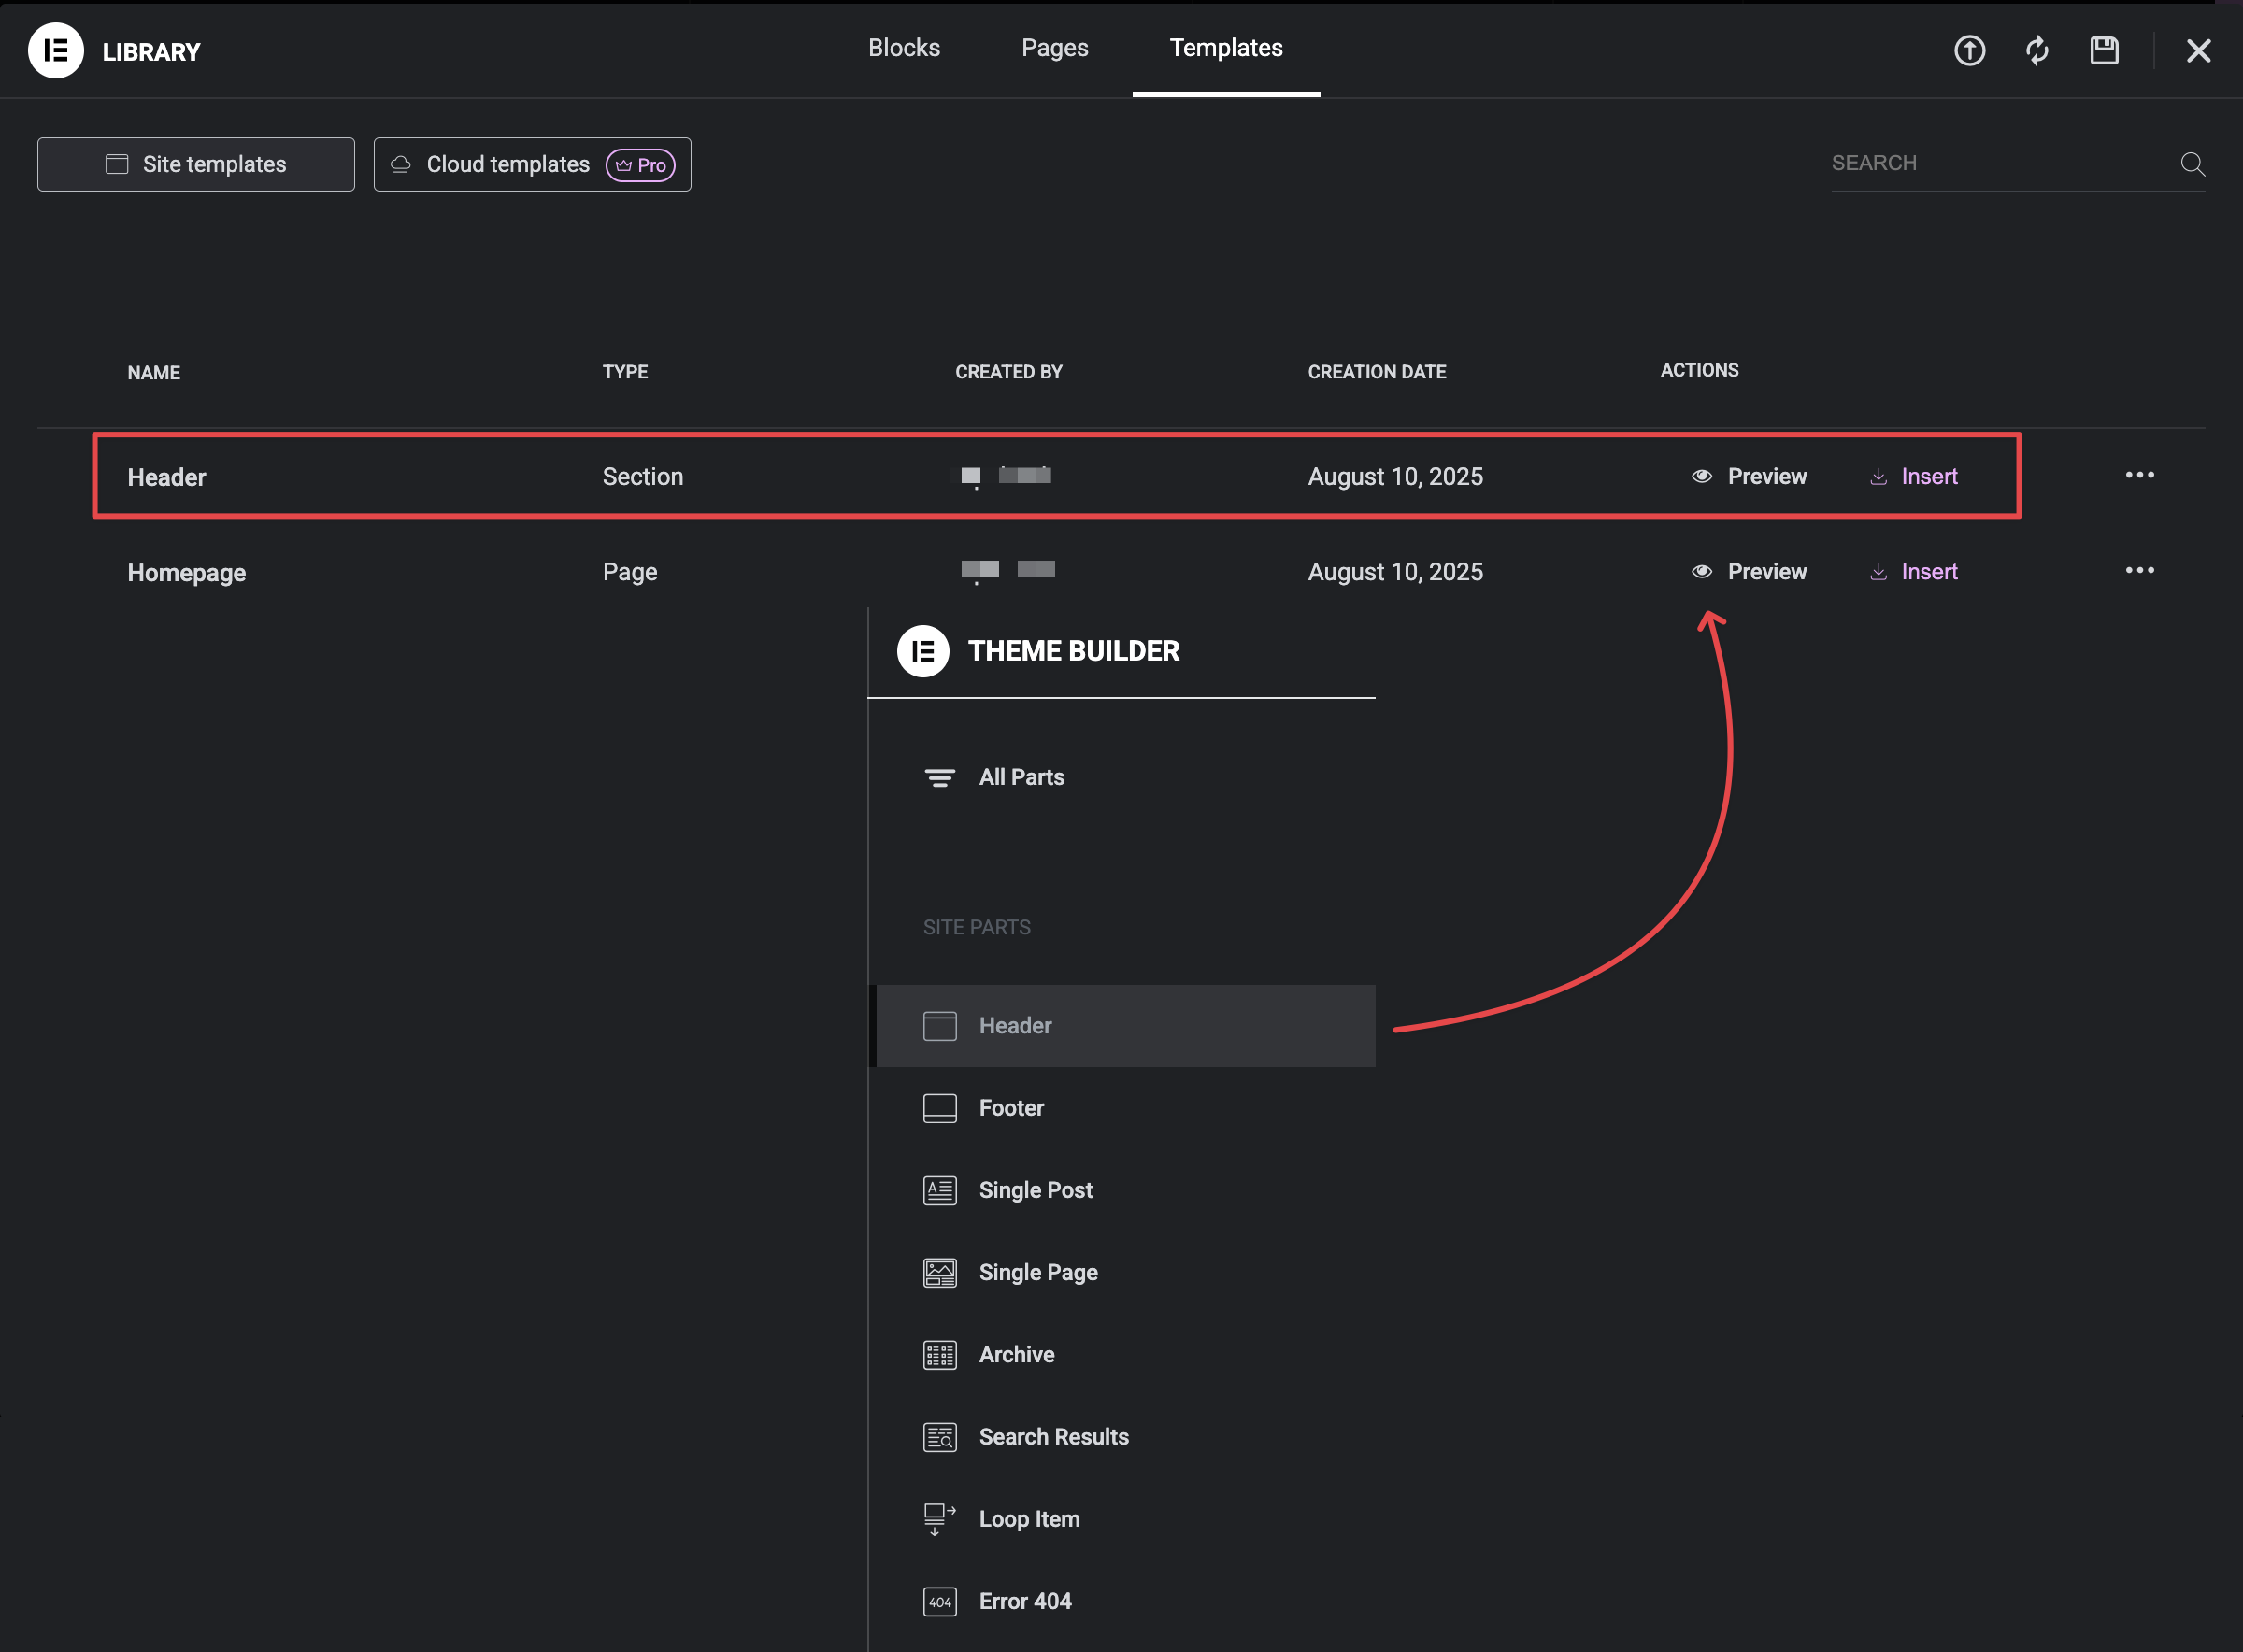
- Once imported, go to Templates → Theme Builder in your WordPress dashboard.
- Find the imported Header template.
- Click Edit with Elementor to customize if needed.
- After editing (or if no edits are needed), click the arrow next to Publish and select Display Conditions.
- Set the display condition to Entire Site to apply the header globally.
- Click Save & Close.
Step 3: Import Footer Template
- Repeat the same process: click Import next to the Footer template.
- Go to Templates → Theme Builder.
- Locate the imported Footer template.
- Edit with Elementor if you want to customize.
- Set Display Conditions to Entire Site to display the footer everywhere.
- Save and close.
Step 4: Check Your Site
Visit your website frontend and refresh the page. You should see your new header and footer applied across all pages.
Tips
- If you want different headers or footers on specific pages, adjust the Display Conditions accordingly.
- Remember to clear your site cache and browser cache if you don’t see changes immediately.
MetForm is a powerful form builder plugin integrated with Elementor. Many Template Kits include pre-built MetForm forms like contact forms or subscription forms, which you can easily import and use on your site.
Follow these steps to import and set up MetForm from your Template Kit.
Step 1: Locate the MetForm Template
- Log in to your WordPress dashboard.
- Navigate to Elements → Template Kits.
- Click View Kit on your chosen Template Kit.
- Look for any templates labeled as MetForm or forms included in the kit.
Step 2: Import the MetForm Template
- Click the Import button next to the MetForm template.
- Wait for the import to finish.
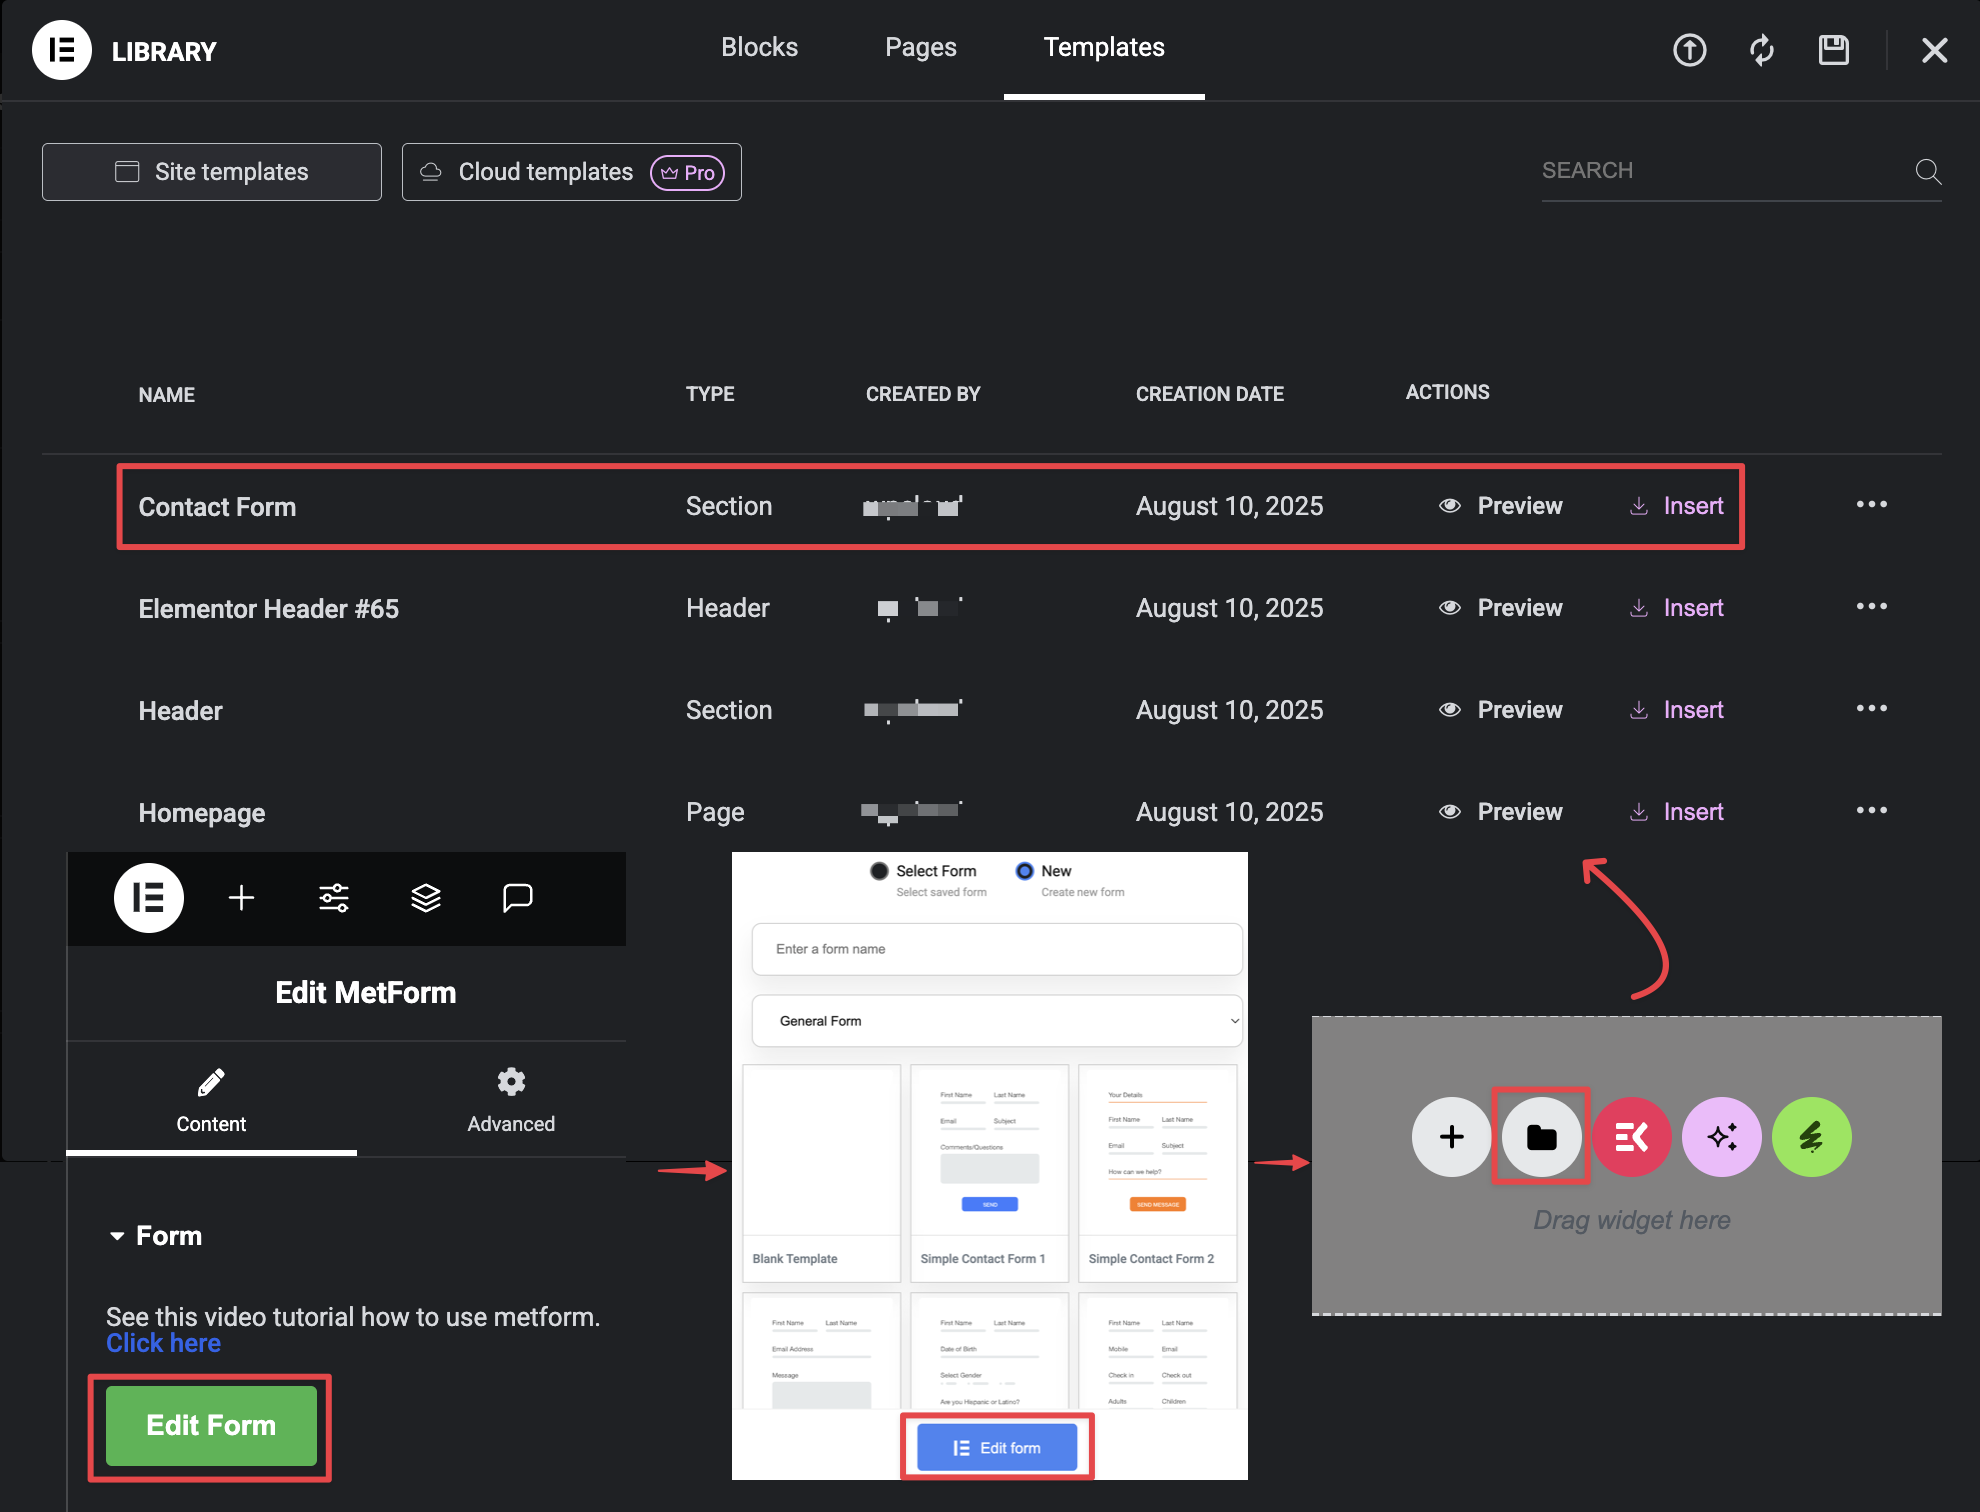
Step 3: Insert MetForm into Your Page
- Go to the page or post where you want to add the form.
- Click Edit with Elementor.
- In the Elementor editor, find the MetForm widget in the sidebar.
- Drag and drop the MetForm widget onto your page.
- In the widget settings, select the form you imported from the dropdown menu.
Step 4: Customize Your Form (Optional)
- You can customize the form fields, styling, and settings directly within the Elementor editor or under MetForm → Forms in your WordPress dashboard.
- Save your changes.
Step 5: Publish and Test
- Publish or update your page.
- Visit your site’s frontend and test the form to ensure it’s working properly.